A squishy, bouncy ball game by Evan Griffiths.
📎 CLICK HERE for an intro to Don’t Drop The Ball
📱 SUBSCRIBE to my newsletter on Telegram to stay up to date
👇 Keep reading below for the latest development updates!

📎 CLICK HERE for an intro to Don’t Drop The Ball
📱 SUBSCRIBE to my newsletter on Telegram to stay up to date
👇 Keep reading below for the latest development updates!
If I were to describe my mentality around this project’s direction a couple of months ago in one word, it would probably be “aimless”. There I was, having just spent a few months trying to develop some decently intuitive level design tools, only to realise that I had no idea how I would actually use them to make fun and interesting levels.
Being a programmer first and a designer second, it is really easy to continually polish, optimise or refactor your game’s code as a way of putting off big scary gamedev tasks that you’re not used to, such as sound, art, level design, or… basically all other aspects of developing a game.
This was exactly the trap I had fallen into, but it took me a while to realise it. I knew I had to make some kind of change to my development process so that I could find the motivation to continue.
Therefore, how did I find a way to move forward with the development of Don’t Drop The Ball?
The answer (in my case) was to spend a week or so almost entirely away from the technologies that I had relied on to create my game so far, and to set a goal: I would design one-hundred levels on my handy portable whiteboard, which I could then bring into my game with the level design tools that I have already created.
So, did I achieve this?
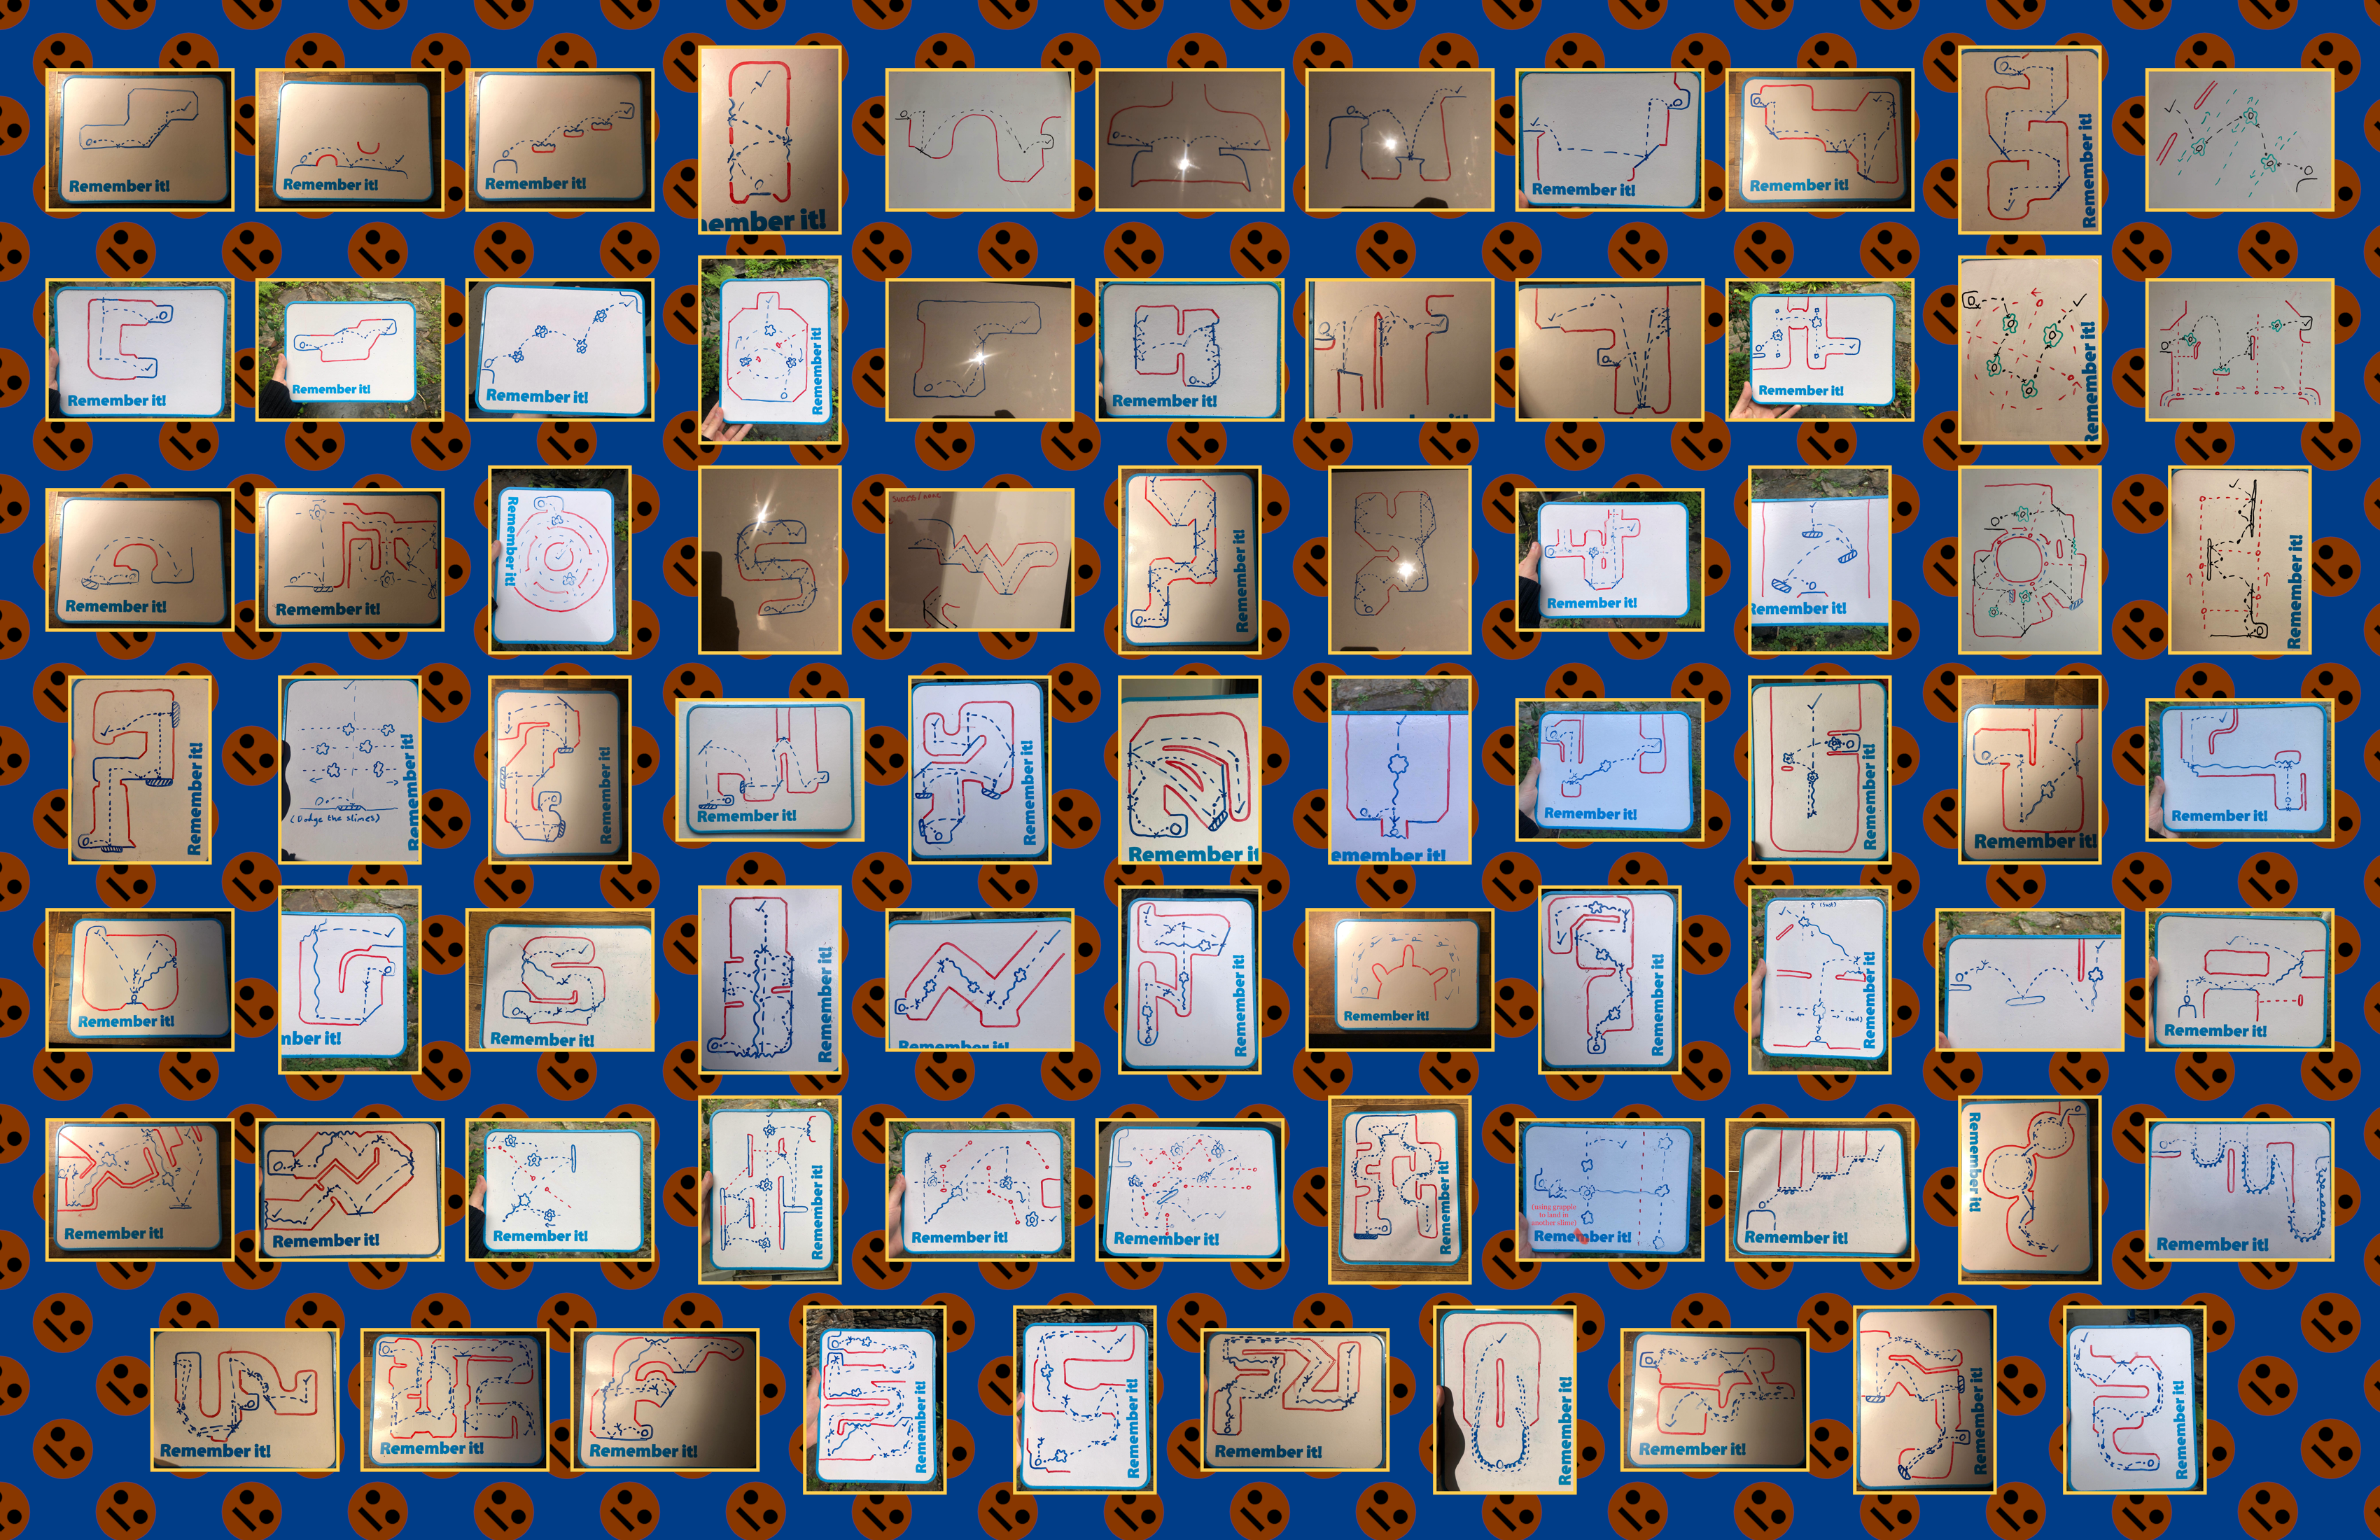
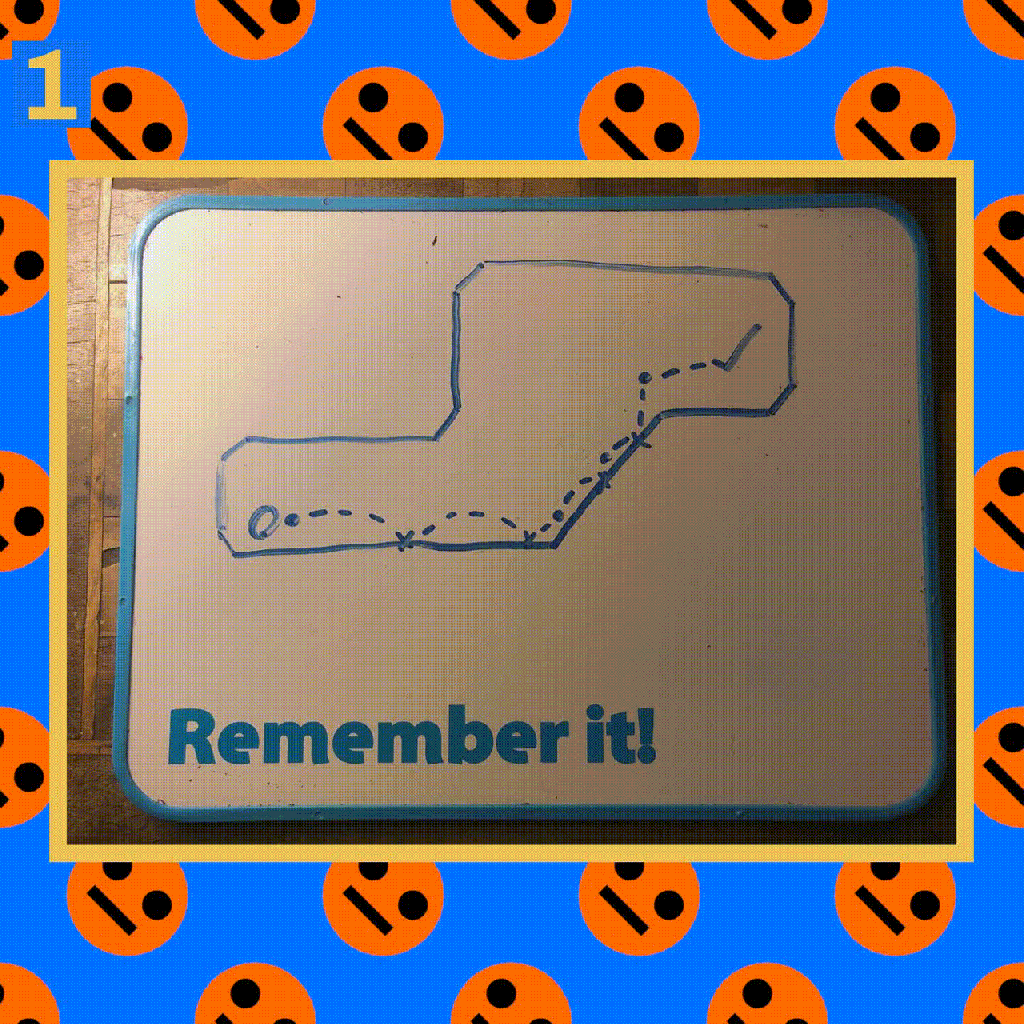
The answer is… almost! I managed to design 76 levels, and you can see all of them in the above image. It’s kind of hard to make anything out at this size, but thankfully, the image is huge, so you can open it in a new tab to have a proper gander at it.
To actually get 76 individual distinct levels designed over that week, I couldn’t just sit down and hope that I would have some spark of inspiration each day. I had to approach this challenge with some kind of plan.
Someone who has struggled with this exact problem (and who I am amazed hasn’t been brought up in these blogs yet) is Game Maker’s Toolkit on YouTube. In his project (which is a puzzle game about magnets), he utilised a method by fellow developer Patrick Traynor in which he would “enumerate all mechanic pairs“.
In simpler terms, he would envision all possible pairs of game mechanics that were present in his game (which can be visualised with a handy grid), and then try and figure out some interesting way of interacting with them both. Even though I’m not developing a puzzle game, this same approach to overcoming the digital blank page proved incredibly useful for my game.
One big advantage of leaving my usual development tools behind is that I could utilise mechanics that had not yet been implemented in the game to come up with some of these designs! So, I could use my imagination to play around with deadly moving lasers, sticky slime surfaces, and goopy grappling hooks, to name a few.
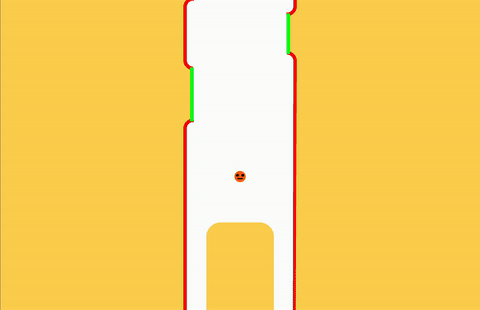
This blog has been DDTB gameplay-light so far, so here are the aforementioned slime surfaces in action. The player can squidge onto them to easily traverse floating platforms and climb walls! But as you’ll see in the following blog posts, that’s not all they can be used for…

I was initially kind of disappointed that I had only made it three-quarters of the way to my goal, but then I remembered that before this, I had maybe 7 or 8 hastily designed test levels which were way too hard for most new players to actually get through (or the ones that have tried my game so far, at least).
Now, I have levels that build gradually in difficulty, incorporating all of the existing mechanics that I have implemented, as well as some new, unimplemented ones. Most importantly though, having these designs to refer to has given me a new boost of motivation to continue with the development of Don’t Drop The Ball, as I now know exactly what I need to implement to have this set of levels ready to play.
By the end of this year, I would very much like to have a demo out that features all 76 of these levels, which I can then shove in front of anyone who’s willing to give it a go, and inevitably see them struggle with the first draft (which is still productive!).
I was initially hesitant to hand the game over in such an early form, but having been inspired by Valve Software’s user testing approach (start testing a game’s mechanics within the first week of development), I’m probably way overdue on gathering feedback for everything I’ve created so far.
Finally, I recognise that it has been a while since the last post on here, so I will also be putting out one post a month for the rest of the year about the new power-ups, terrain types and levels that I will create!
Thanks as always for reading ❤️
At risk of overgeneralising, video games are not fun without some kind of a challenge.
When we last left off, I had crafted a system for Don’t Drop The Ball that allowed me to carve out levels in an intuitive way, where I could draw, drag and delete bits and pieces of terrain for the ball to bounce across. This is a good foundation for creating levels, but alone, it gives me very few options to challenge players in interesting ways.
So, how could I build from here to generate more interesting gameplay scenarios?

I had already created draggable blocks that could boost the player in a certain direction, or destroy the player and send them back to the beginning of the level. As I mentioned in the previous post though, this system is frustrating to use, as it is nigh on impossible to line these suckers up perfectly with each other.
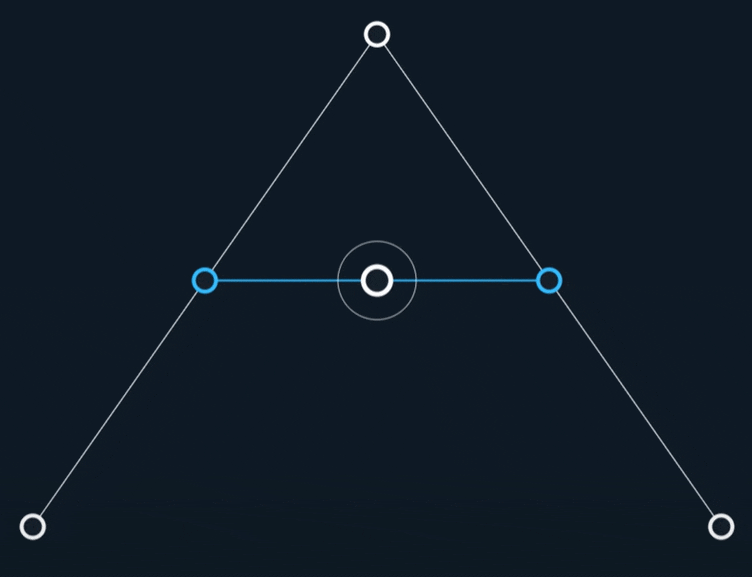
That’s when a thought came to me; why not create a system where we can apply these modifiers to any bounce-able surface to make them helpful or harmful to the player? Instead of painstakingly dragging bounce pads or deadly surfaces into the scene, we could instead create terrain with the existing tools, and then draw onto their edges to apply a modifier!
I had originally envisioned a system where the user (i.e. me, for now at least) would basically wrap cling-film around the terrain objects by clicking and dragging one of two handles, with the surface being formed between the two. However, I realised that this was relying too much on the user understanding the complexities of this system.

So, I instead designed this tool so that it would pre-compute the “cling-filmable” areas, which are initially marked with these dotted lines that can be seen next to the terrain edges.
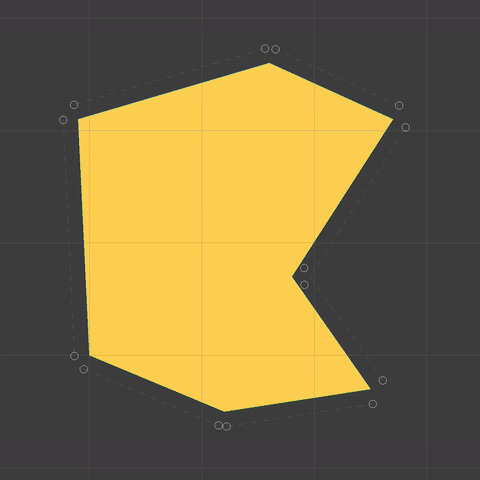
Hovering the mouse near these edges highlights them, and clicking and dragging applies whatever effect is selected (from a dropdown, not pictured)!

Once we are done adding these effects, all previous features of the terrain editing system will work just fine with the new fancy edges. We can add, remove and curve-ify points, and as long as there is no conflict between effects, the existing effect will remain!
Once I had this system up and running, it was time to find out just how helpful it would be in designing levels for Don’t Drop The Ball. You may recall the following level from previous posts…
I very much like the design of this, where the player is made to use the terrain to clear the deadly gap at the start, then utilise the bounce pads to clear the larger gap at the end. However, I very much do not like its blocky and messy appearance.

Here’s what the level looks now! In my opinion, much improved. Obviously, the visuals as a whole need to be gone over and polished at some point in the future, but the ability to make curved terrain (especially with edge effects attached) allows me to add some much needed visual flourishes to the levels.
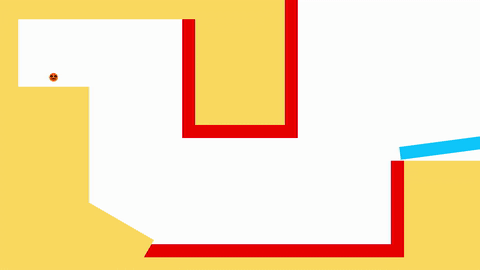
It also enables further level design possibilities that would be very difficult to implement before (or even impossible). For example, here’s a section of a new level that I’m working on…

In Don’t Drop The Ball, the player is allowed to launch the ball once in mid-air, but the ball is then required to make contact with one of the bounce-able surfaces to be able to launch again.
The start of this level requires the player to utilise the boost pad to launch into the slanted ceiling. This gives the ball the momentum to clear the curved deadly terrain on the right hand side of the screen, but it also lets the player keep their one mid-air launch, which is required to knock the ball into the second boost pad.
This kind of level would be impossible to craft with the previous tools I had at my disposal. Positioning the deadly terrain in the same curved formation would take an absolute age!
The presence of some form of danger in these levels (like the deadly terrain) is super important, because it not only gives the player a hurdle to get over, but it also can be used to help guide the player to the areas of the level that I intend for them to go to. Theoretically, the same could also be achieved by attracting the player towards items/terrain that will help them, such as the boost pads.
I finally feel like these tools are developed enough to the point where I can start messing around with different level design ideas easily, which is a very exciting prospect! Alongside this, I plan to expand the number of terrain effect types from just the existing boost pad and deadly terrain, but I will discuss this more down the line.
Taking a step back even further, I want to consider other ways in which I can present diverse and interesting gameplay scenarios in Don’t Drop The Ball. I have ideas for various different power-ups that will introduce cool new gameplay mechanics, as well as creating new obstacles for the player to reckon with.
I am putting a lot of effort into making these tools fun and simple to use now, because ideally, I will eventually be able to give them to the player so that they too can create their own levels. Therefore, I’m going to focus on them for a while longer. After this, I can get my head down and focus on creating more content for the game!

A game engine alone can produce any game, but it can not produce your game
Confucius, probably
The developers of an engine such as Unity can not possibly cater to any one specific game concept or idea. When it comes to making your game, that is on you alone, and my first major realisation of this dawned on me when I started to design levels for Don’t Drop The Ball.
All of the levels shown in the previous blog post were designed by painstakingly dragging a limited selection of default shapes into the scene and manually setting up their collision data. These levels are very short because repeating this ritual over and over to create them was wasting my precious time! They’re also not particularly inspiring to look at.

Mmm, boxy.
If only there was a way for me to design my own level editing tools inside of my game engine…
Oh wait, there is! Unity provides a whole editor scripting system that enables regular dorks like me to create all manner of custom tools, with windows, buttons, sliders and more!
In my use case, the most important thing is that it enables me to listen for mouse and keyboard inputs, then run some code to add and modify game objects in response to them!
With this in mind, I set out to create a system that would let me draw terrain objects in the scene by left clicking to create points and lines.

Here’s the initial crusty version of this system.
Here, I’m using Unity’s built in Edge Collider and Line Renderer components that both take a list of points in 2D space, then uses those to respectively define some collision boundaries (so the ball doesn’t fall through the floor) and draw a line on the player’s screen (so the player can actually see the floor).
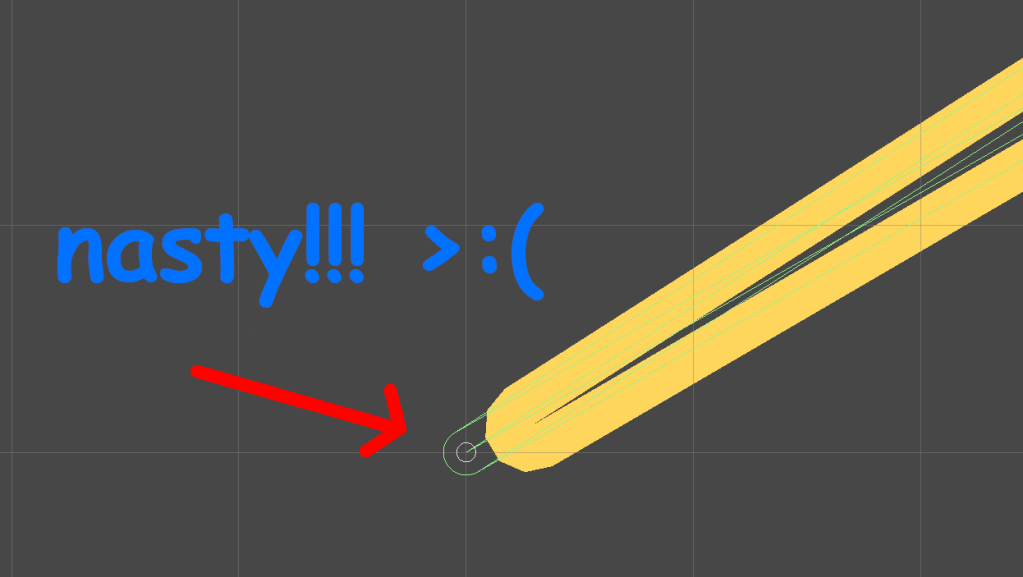
This is a good start, but it turns out that the built in Line Renderer actually super sucks. It doesn’t even attempt to match the boundaries formed by the Edge Collider, which can cause the ball to appear like it is bouncing off of thin air!
More importantly than this though, I always intended for these terrain objects to be solid shapes, and not hollow in the centre. However, I knew that would be significantly more difficult to get working, so I treated this basic version as a stepping stone.
In game development (and to a degree, in life in general), it is usually sensible to break complicated tasks down into smaller chunks like this so that you don’t get overwhelmed with their overall complexity.
In basically all games set in a three-dimensional space, solid objects are rendered to the screen by smooshing a bunch of triangles together, and those triangles are usually positioned by an artist in some 3D modelling software beforehand.
This concept can apply to 2D games like Don’t Drop The Ball as well. In this case, I needed some kind of algorithm that would automatically generate those triangles so that they draw a shape that exactly matches the one that I’ve drawn in the editor.
This process is known as polygon triangulation, and there’s one technique (known as ear clipping) which will get the job done provided that you give it the list of drawn vertices in clockwise order, and that none of them are collinear (a.k.a. when more than two vertices form a straight line).
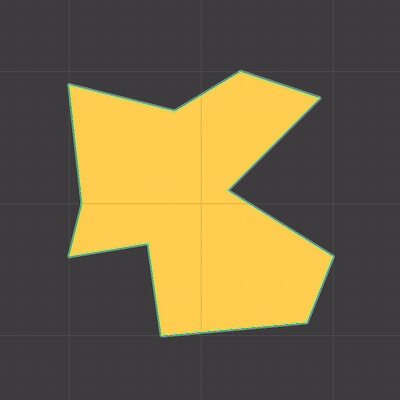
By implementing this algorithm with my existing terrain drawing code, our shapes are now completely solid, and they exactly match the Edge Collider points!

📎 Watch Polygon Triangulation – Overview of Ear Clipping by Two-Bit Coding if you want a really good explanation of this algorithm.
At this point, there was one big piece missing with the terrain editing system: there was no editing. Once I’d created a shape, I’d better have liked how it looks, because it was going to stay that way forever. To amend this, I created a default Edit Mode that is constantly running whenever you’re not creating a new floor.
This mode lets me drag around or delete any vertices on any existing terrain shapes, which is convenient for if I don’t quite draw a shape right the first time, and don’t feel like drawing it again from scratch.

However, I also went one step further in this mode by adding a floating cursor that appears whenever the mouse goes near an edge.
If you click and drag this cursor, you add a new vertex between the two vertices that form the line you drag from, which essentially lets you add new edges to existing shapes!
Drawing shapes with straight edges is all well and good, but I also envisioned being able to create terrain objects with smooth curves as well.
This is where Bézier curves come in. Many game devs will be well acquainted with these, because they are one of the simplest ways to mathematically define a curve, and they have loads of different applications, such as defining a smooth path for a camera to travel along, or using them to detect how far players are along a track in a racing game.
They work by linearly interpolating (or lerping) between two connected lines, then forming a line at the lerp points, and then finally lerping on that line. That final lerp point’s path will form a smooth curve!

The simplest way I could think to introduce this Bézier curve into my existing terrain code was to create the concept of vertex types. By default, all points behave as they had before where they form a sharp point.
Now, when I shift + click a point, it toggles it between the default and curved modes. When it’s in the latter mode, the selected vertex and its two surrounding vertices form the “control points” of a Bézier curve!
This still uses the existing ear clipping triangulation code to render the shape; I cut the resulting curve into multiple small straight line segments, which gives the illusion of a smooth curved line.

This opens up a whole bunch of level design possibilities, as I can now create half-pipe/quarter-pipe structures that the ball can slide down, amongst other things.
📎 The Continuity of Splines by Freya Holmér was an invaluable resource for all of this work, and is a super interesting watch regardless.
I am very happy with where I’ve got to with this current terrain editing tool, but there are a whole bunch of things left to add to it, such as…
Once I have done these bits, I will finally be ready to sit down and design some actual fun levels, and not just random blobs.
P.S: Words do not make for fun levels.
…is a 2D physics platformer game about a rotund bouncy guy (pictured).
It’s kind of like Super Mario Bros. with a squash ball, where instead of running and jumping, you are flinging yourself across levels and bouncing into walls, deadly spikes, boost pads and other gizmos.
The game is super easy to pick up, because you control it entirely with a single controller stick or mouse.
Here is the list of things I am set on:
Here is what I’m not set on:
I am at such an early stage of development that it would not be sensible to lock myself into any one aesthetic, setting or narrative. Right now, I am at the throwing-stuff-at-the-wall-and-seeing-what-sticks (or bounces 👹) phase. It is scary, but also exciting! I am staring down the video game equivalent of a blank page, on which I can write anything I want.

I have historically been a serial un-finisher of game dev projects. Some can be seen (or even played) on my old portfolio site. If you try any of them, try Disasteroids (it’s pretty fun).
I’m deciding to kick the not-finishing habit and go all-in on this one. This blog will (hopefully) act as a no-motivation deterrent; I very much enjoy showing my game progress to my friends and loved ones, and this way, I can have a single place to point them to when I have something new to talk about.
Speaking of which…
I aim to post updates every 4 to 6 weeks, or whenever I have something cool to show.

